Hey all,
Hope you are safe and healthy during pandemic.
Continuing the post series that we started some days ago, this is the third post about AutoScaling. Today we will start Hands-On to create an environment with AutoScaling.
You can follow this post series here:
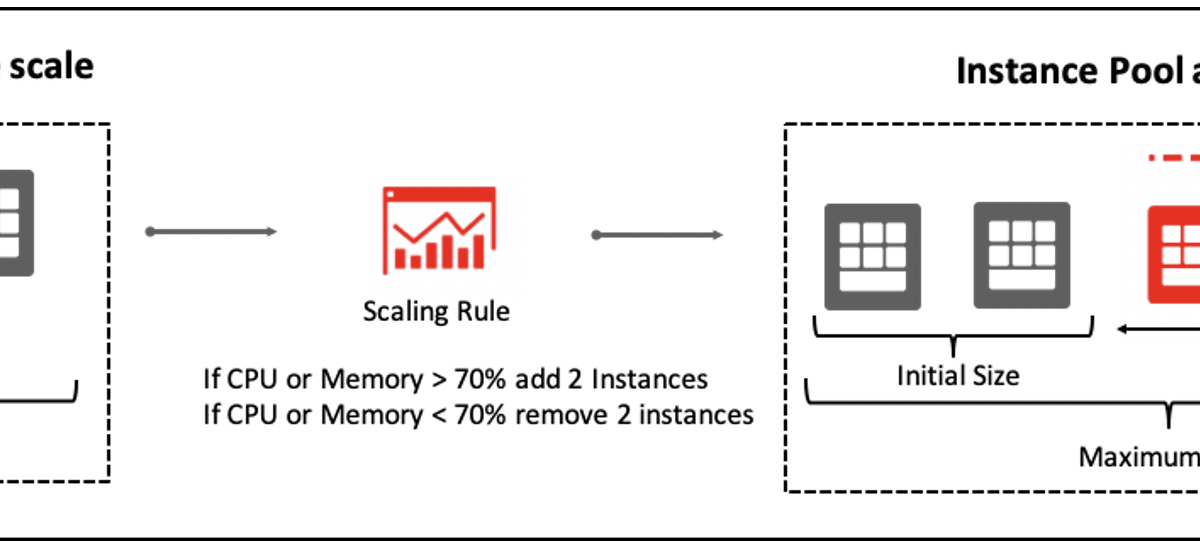
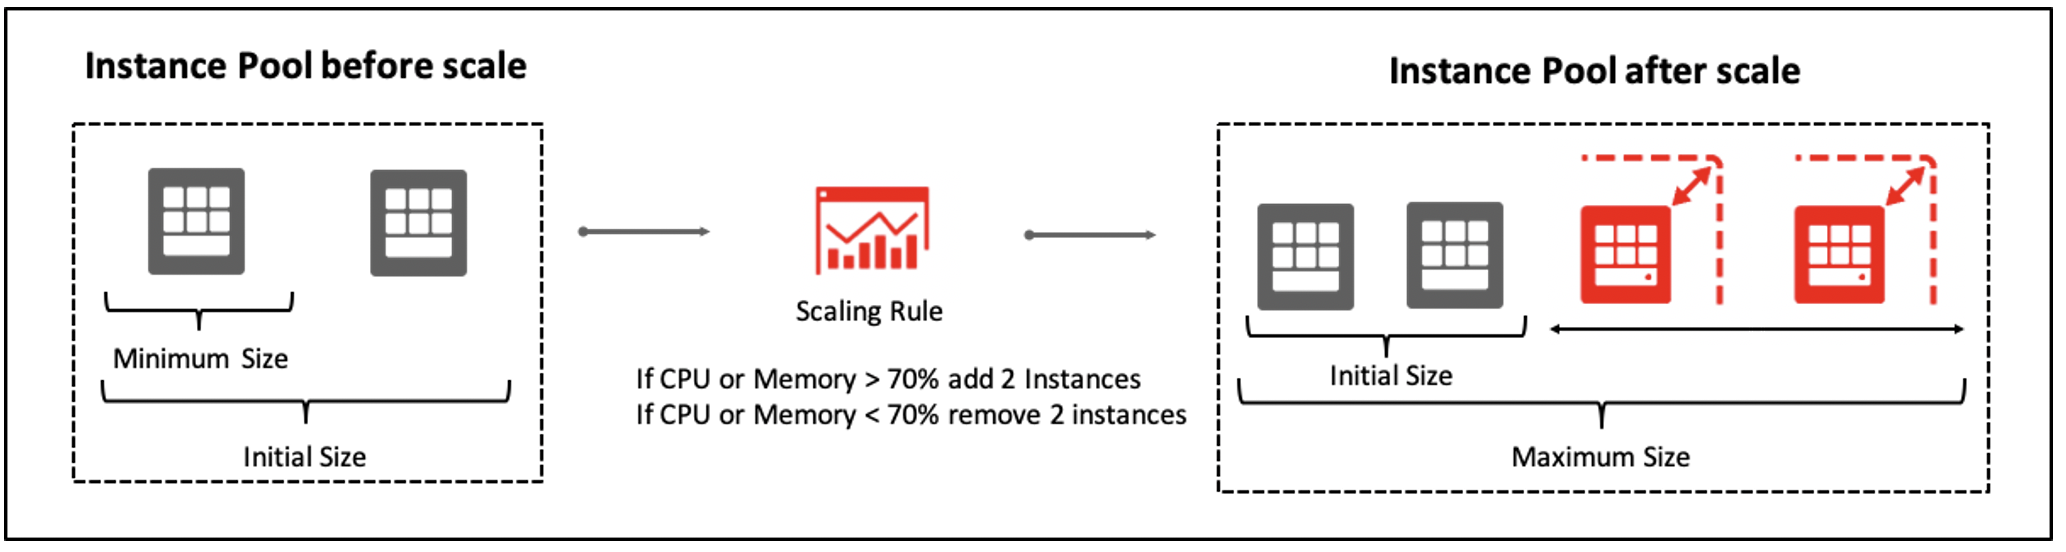
Scaling Challenges in On-Premises Workloads – Post 1
AutoScaling on Oracle Cloud Infrastructure – Post 2
In order to have our OCI resources isolated and organizated, we’ll create a Compartment. In this example we will create only one compartment. This maybe is not a recommended option in a company. The best scenario is to have resources segregated to guarantee the least privilege principle, also, if you can segregate resources by compartment, you can monitor the cost for them, of course, you can also use tags to do that. But this will be discussed in another moment here. 😃
The resources will be created in the following order:
- Compartment creation;
- VCN/Subnets creation;
- Load Balancer creation;
- Security List updates on Ingress Rules to enable AutoScaling to attach an Instance on Load Balancer;
- Instance creation;
- Customization of instance created;
- Custom Image creation;
- Termination of Instance created;
- Creation of an Instance using the Custom Image;
- Creation of an Instance Configuration;
- Creation of 2 Instance Pools;
- Creation of 2 AutoScaling Configurations.
Probably the post will be very long, so, I will create another one to continue.haverá outro continuando.
Compartment Creation
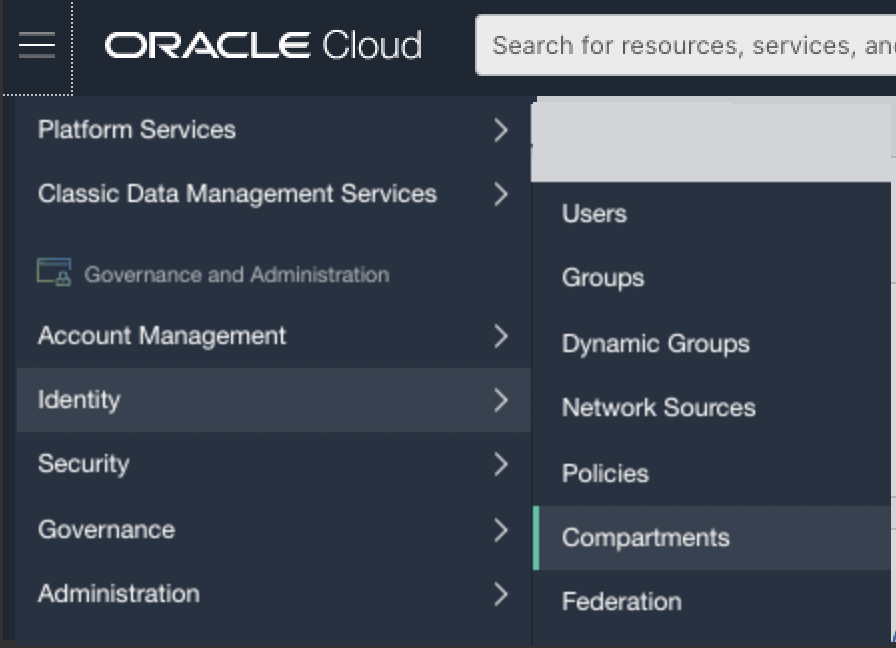
Well, at home screen, click in hamburger icon and then go to Identity and then Compartments:
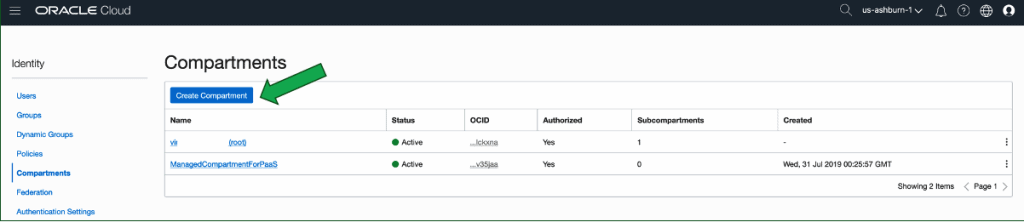
The existing compartments will be exhibited. Click on button Create Compartment:
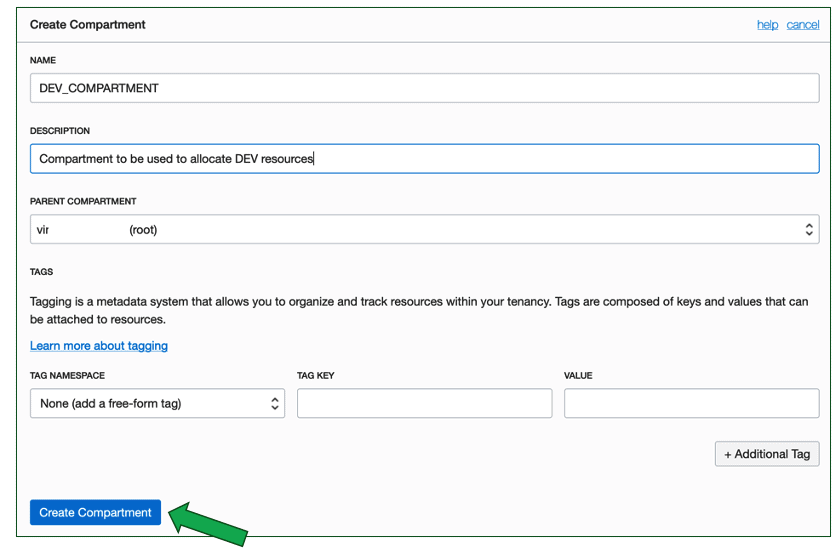
The screen to create Compartments will be exhibited, input a name (DEV_COMPARTMENT in example) and then click on button Create Compartment:
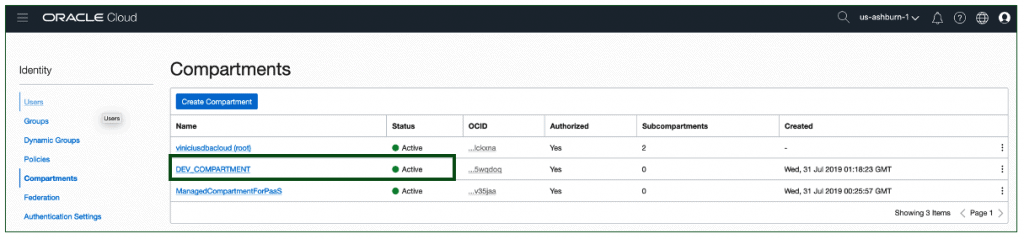
The compartments will be exhibited again. Now there is a compartment called DEV_COMPARTMENT:
VCN/Subnets Creation
In the home screen, click on Set up a network with a wizard

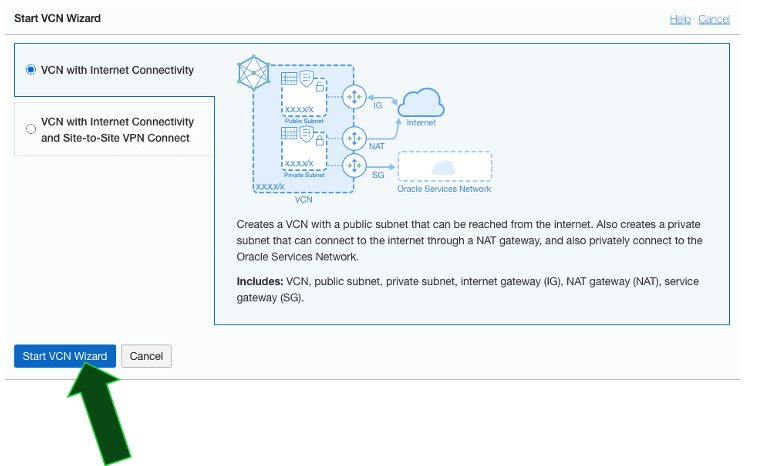
The following screen will be exhibited:
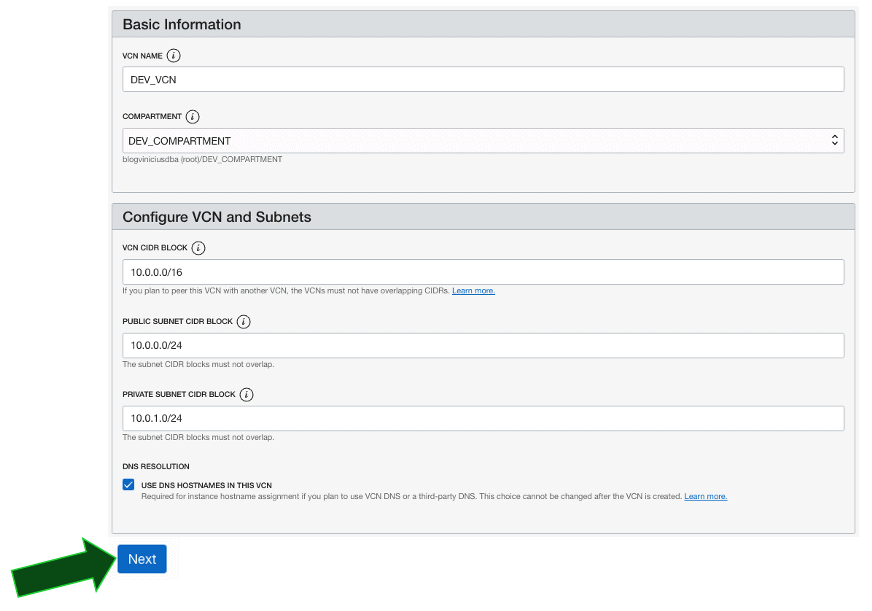
Input a name for VCN, in my example the name is DEV_VCN and choose the compartment DEV_COMPARTMENT. You can review CIDR Block and them click on Next:
Review all the data about VCN and click on button Create:
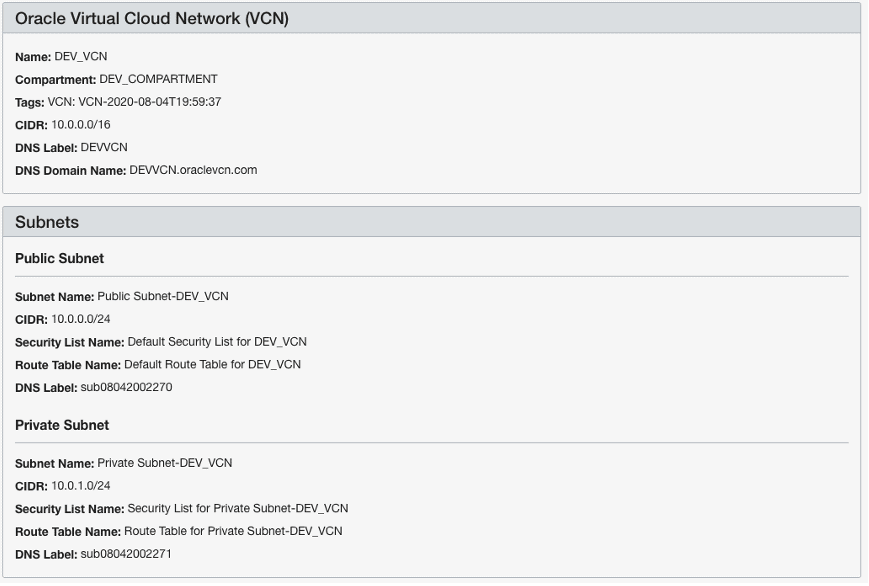
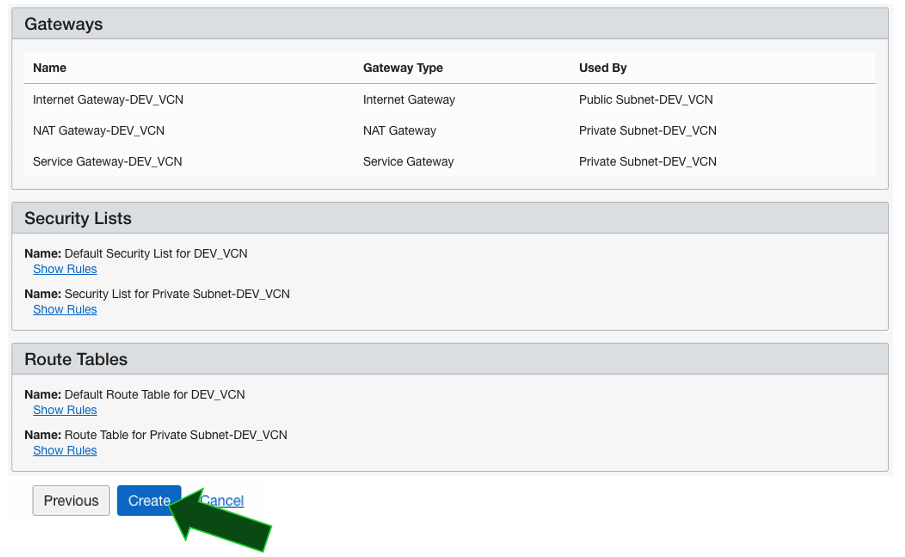
A review about the resources being created is exhibited:
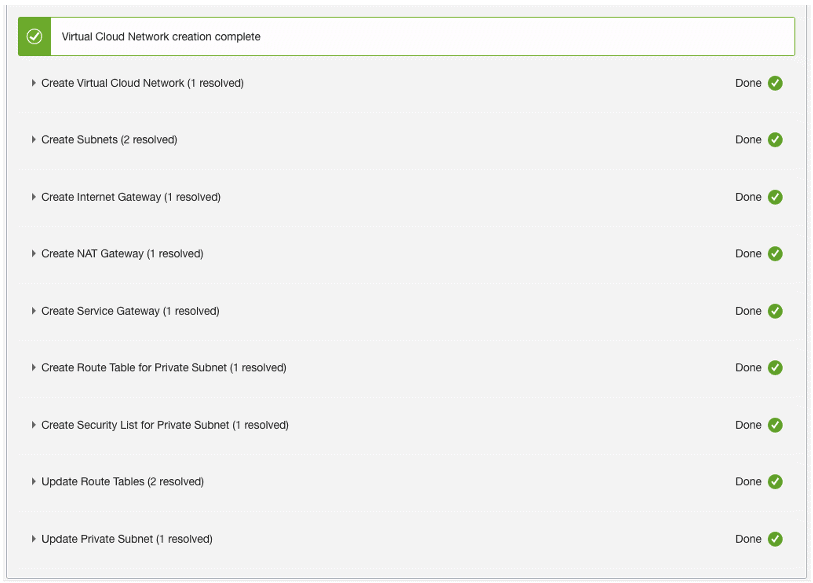
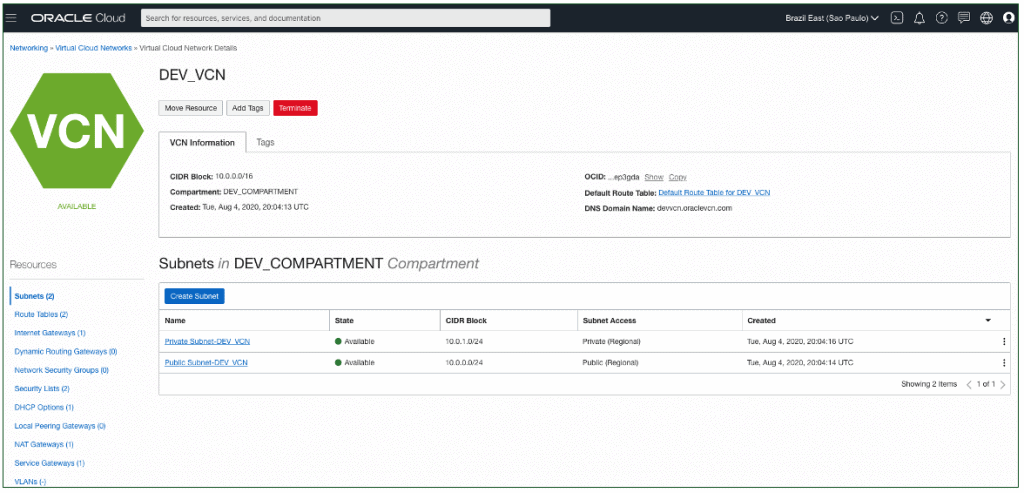
We can see below the details about new VCN:
Load Balancer Creation
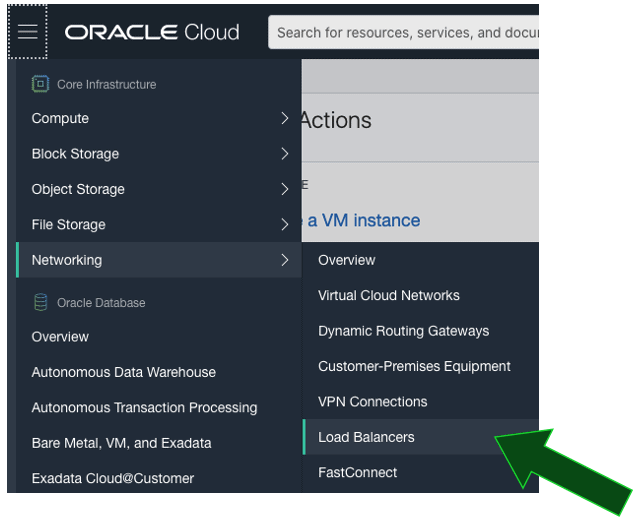
In the home screen, click on hamburger, then go to Networking and then to Load Balancers:
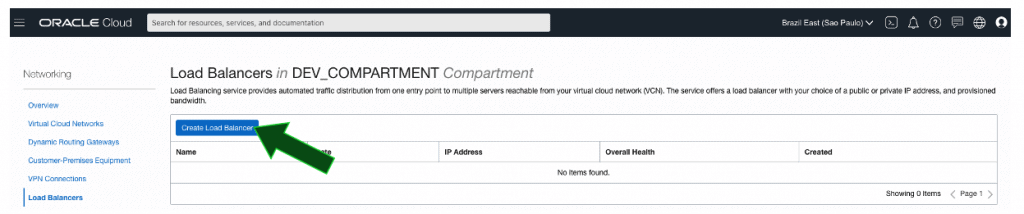
Click on button Create Load Balancer:
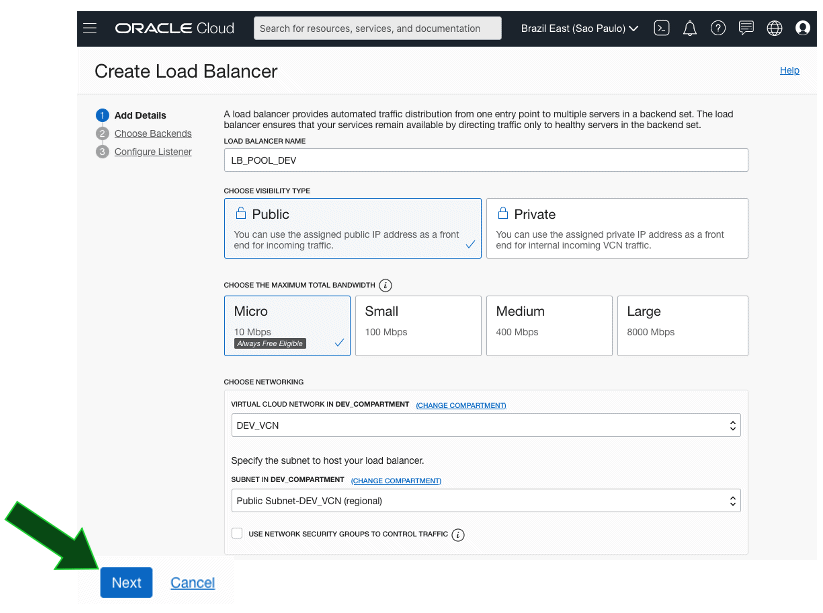
Input a name for Load Balancer (LB_POOL_DEV in example below), keep the visibility type to Public and shape Micro selected. Choose the VCN DEV_VCN and Public Subnet, then click on Next:
In load balancer policy, choose Weighted Round Robin, specify HTTP Protocol and port 80, then click on Next: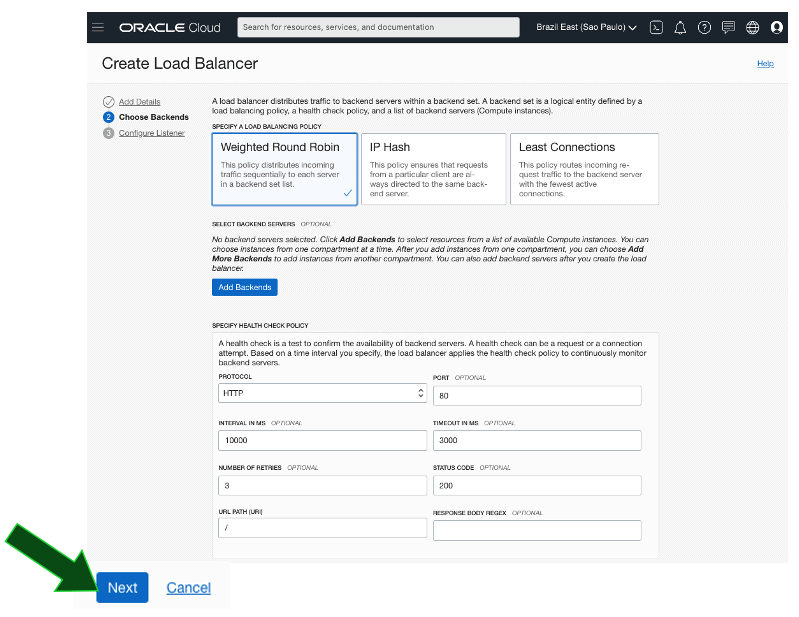
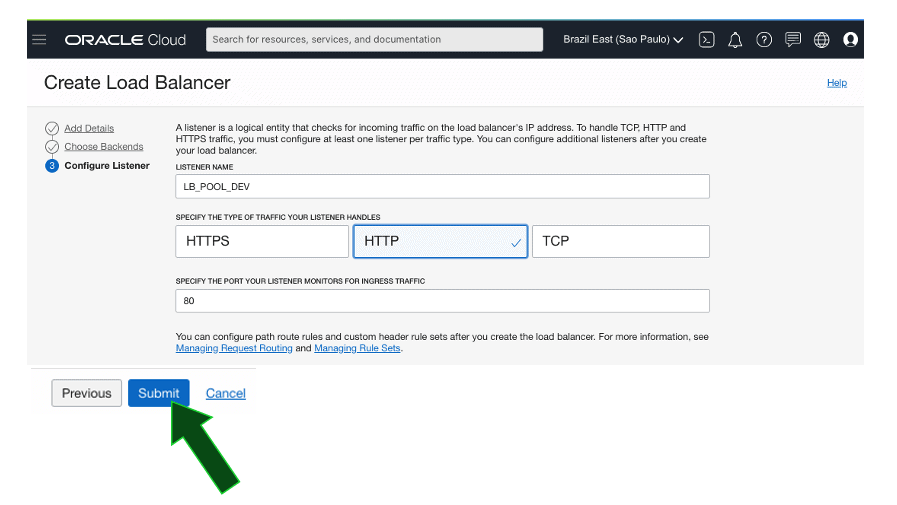
In listener, input a name: LB_POOL_DEV, choose the protocol and port 80, click on Submit:
The Load Balancer will be created: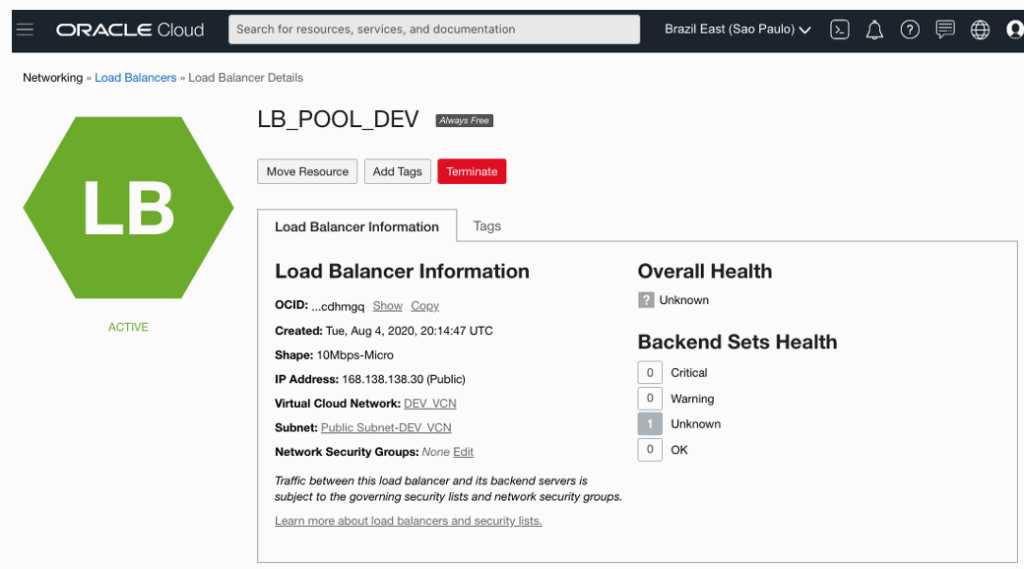
Security List updates on Ingress Rules to enable AutoScaling to attach an Instance on Load Balancer
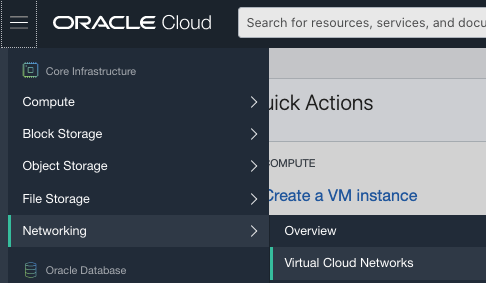
Clique on Hamburger, then go to Networking and then to Overview:
Click on DEV_VCN:

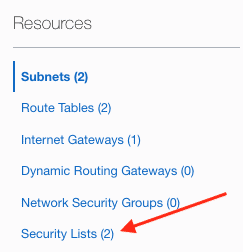
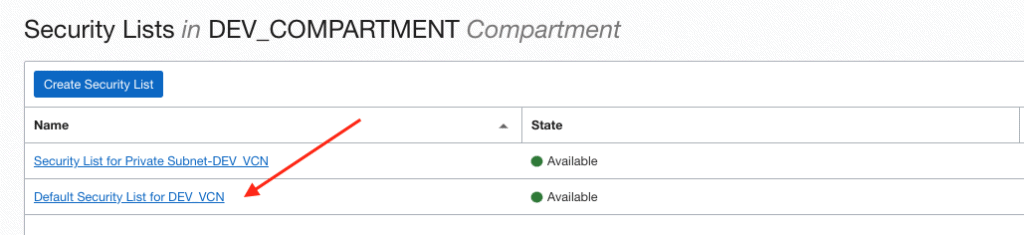
In bottom left corner, click on Security Lists:
Click then on Default Security List for DEV_VCN:
Click on button Add Ingress Rules, two rules must be added, they are highlighted in red retangle:
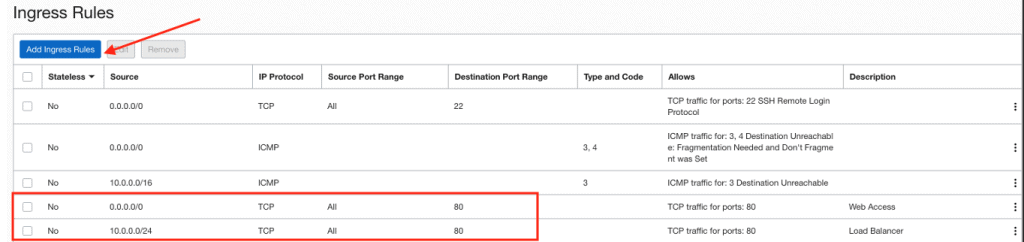
Rule 1 (to access from users to site/application on port 80):
Stateless: No
Protocol: TCP
Source: 0.0.0.0/0
Destination Port Range: 80
Rule 2 (to access from load balancer on port 80)
Stateless: No
Protocol: TCP
Source: 10.0.0.0/24
Destination Port Range: 80
Instance Creation
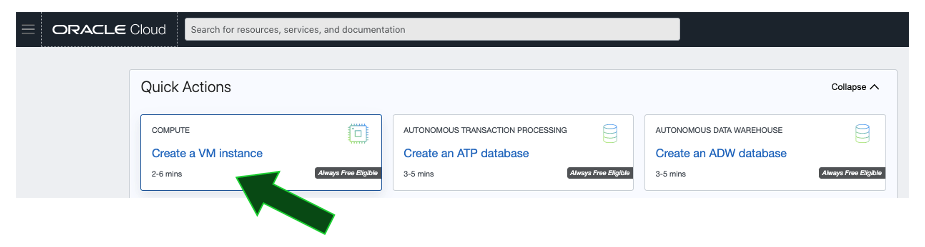
In home screen, click on Create a VM instance:
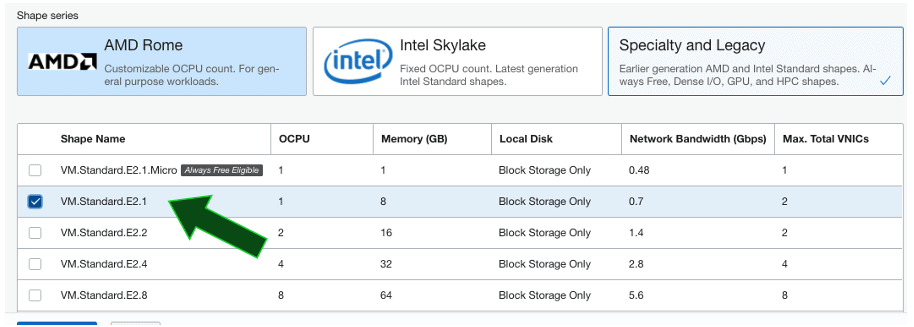
A wizard will be exhibited, the following options were changed:
Name: default-web
Compartment: DEV_COMPARTMENT
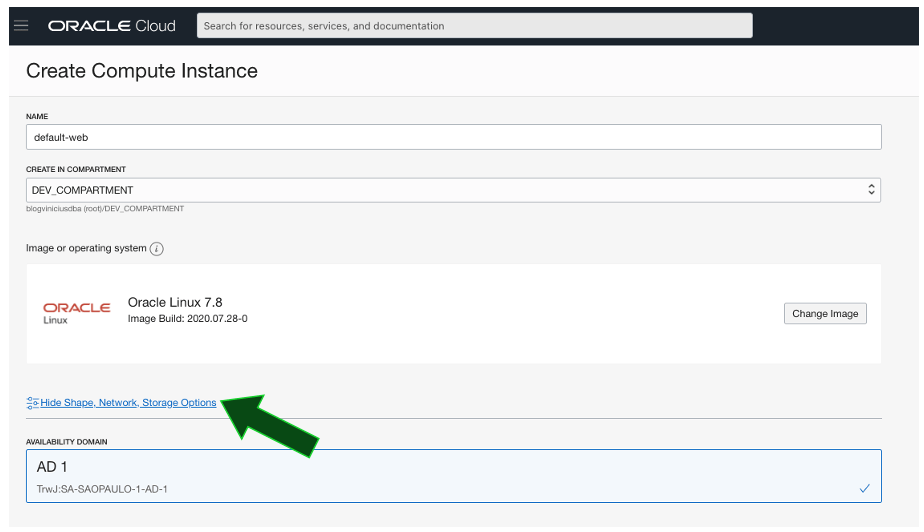
Shape: VM.Standard.E2.1
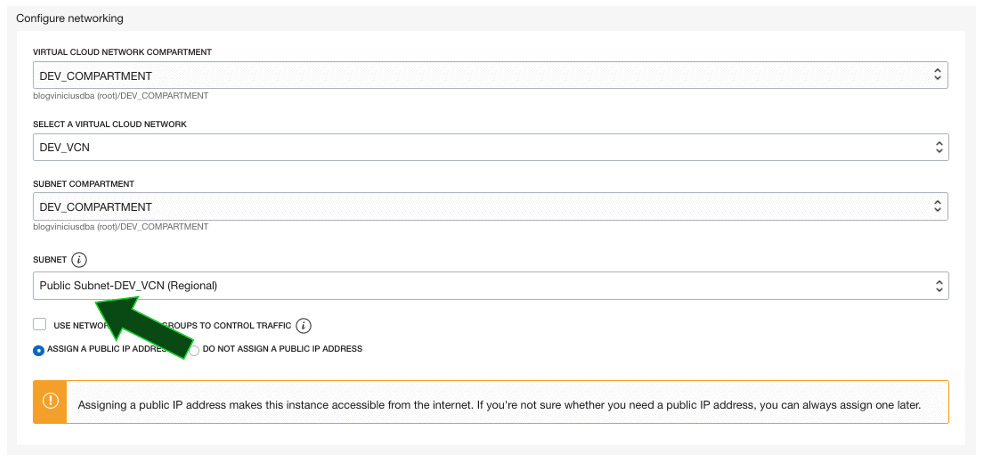
Virtual Cloud Network Compartment: DEV_COMPARTMENT
Virtual Cloud Network: VCN_DEV
Subnet: Public Subnet
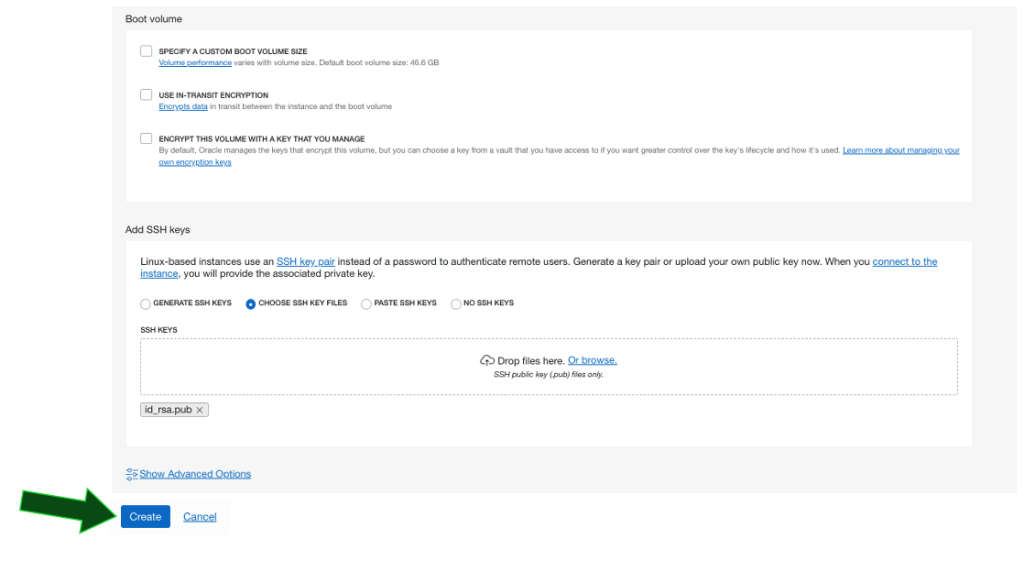
Choose SSH Key Files: choose an existing SSH Key if you already have one. If you don’t have a SSH Key, choose Generate SSH Keys. Then, click on Create:
The created instance will be exhibited:

We’ll continue in the next post.
Hope this helps.
Peace!
 Vinicius