Hey all!
Hope that you are OK!
This is the third post of OCI. You can see the another published posts:
Oracle Cloud Infrastructure – Post 1 – Creating an OCI Account
Oracle Cloud Infrastructure – Post 2 – Key Concepts
In this post, we will explain how to create a Compartment and also how to create a VCN with the related resources.
Well, we discussed in post Oracle Cloud Infrastructure – Post 2 – Key Concepts that is a best practice isolate our resources in different Compartments, also, we discussed about the best practice to never create resources in root compartment. So, we need to create a new Compartment. But, creating compartment is not enough to be able to create resources. After compartment creation, we need to create our VCN – Virtual Cloud Network – and also route tables, gateways, subnets and security lists.
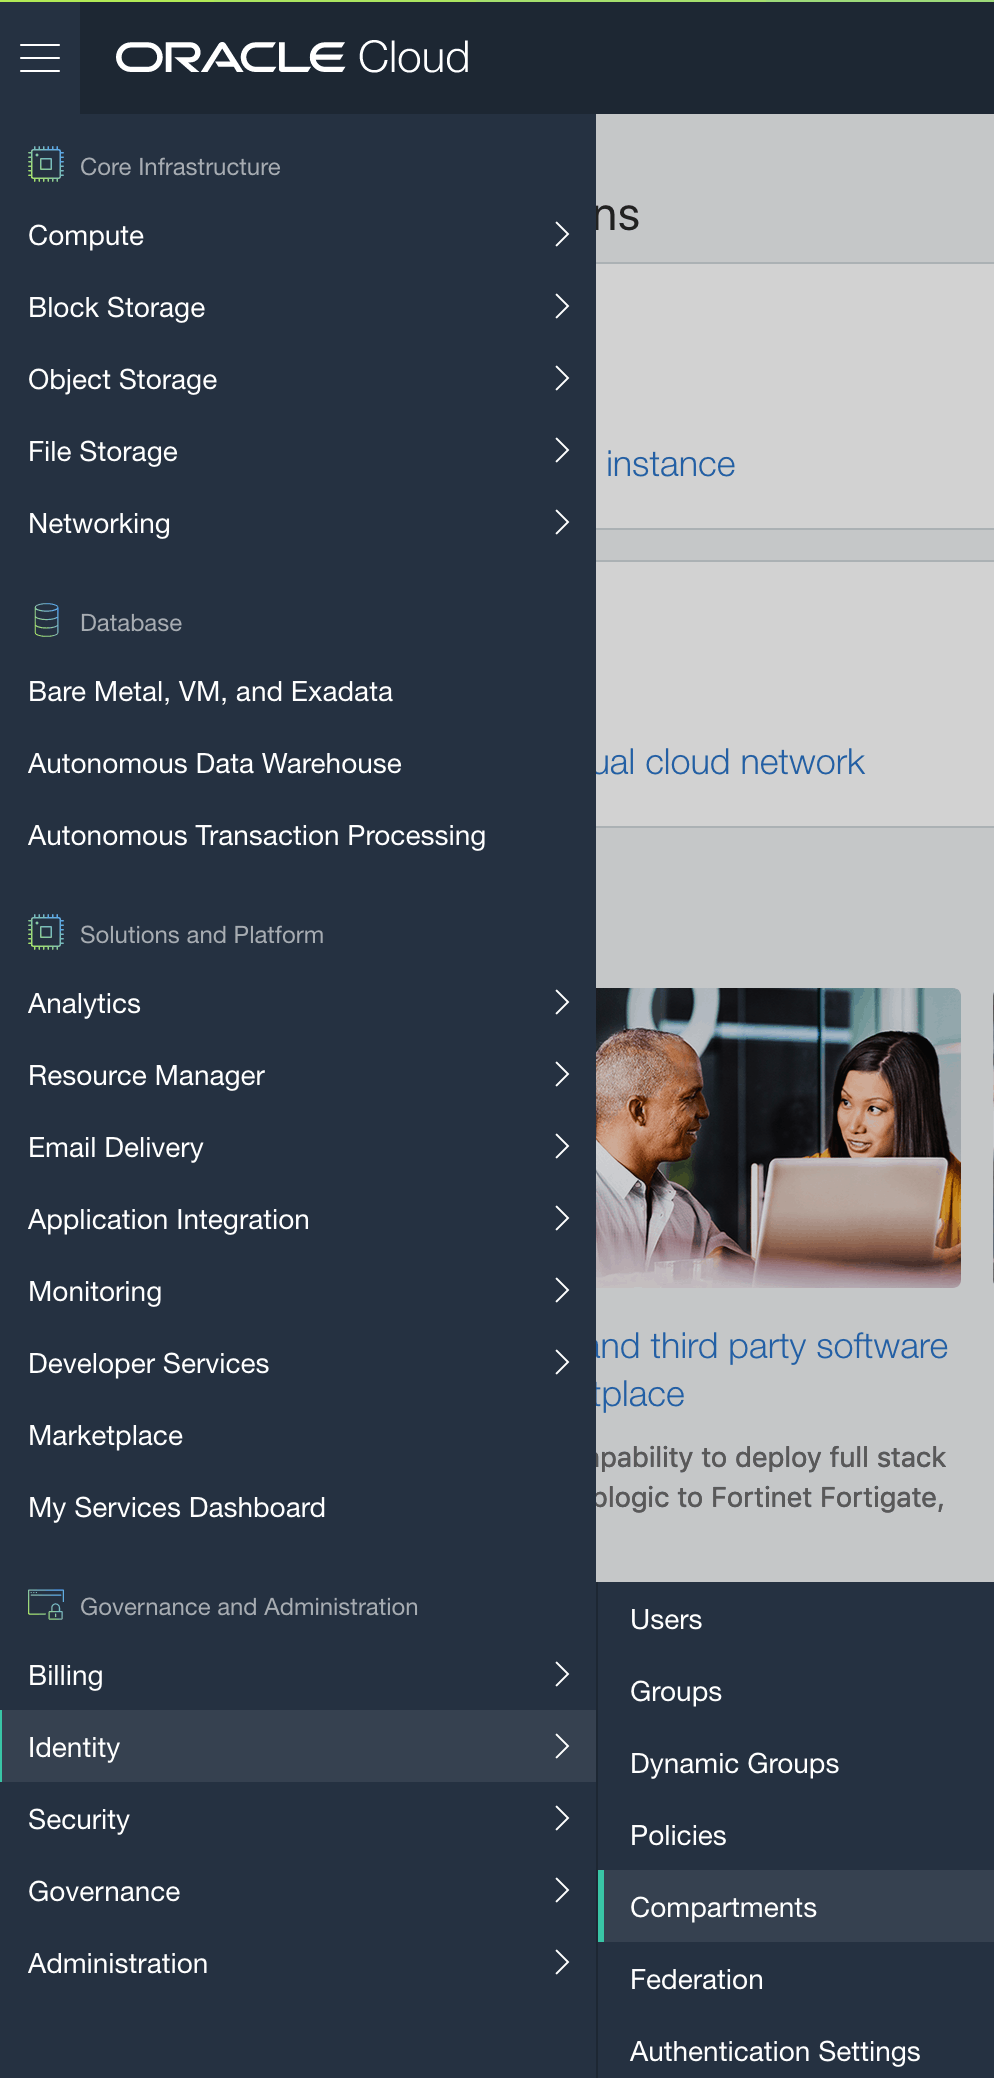
In the home screen, click in the hamburger button (top left corner), go to Identity and then Compartments:
The screen for Compartments it will be exhibited. Click on [Create Compartment] button:

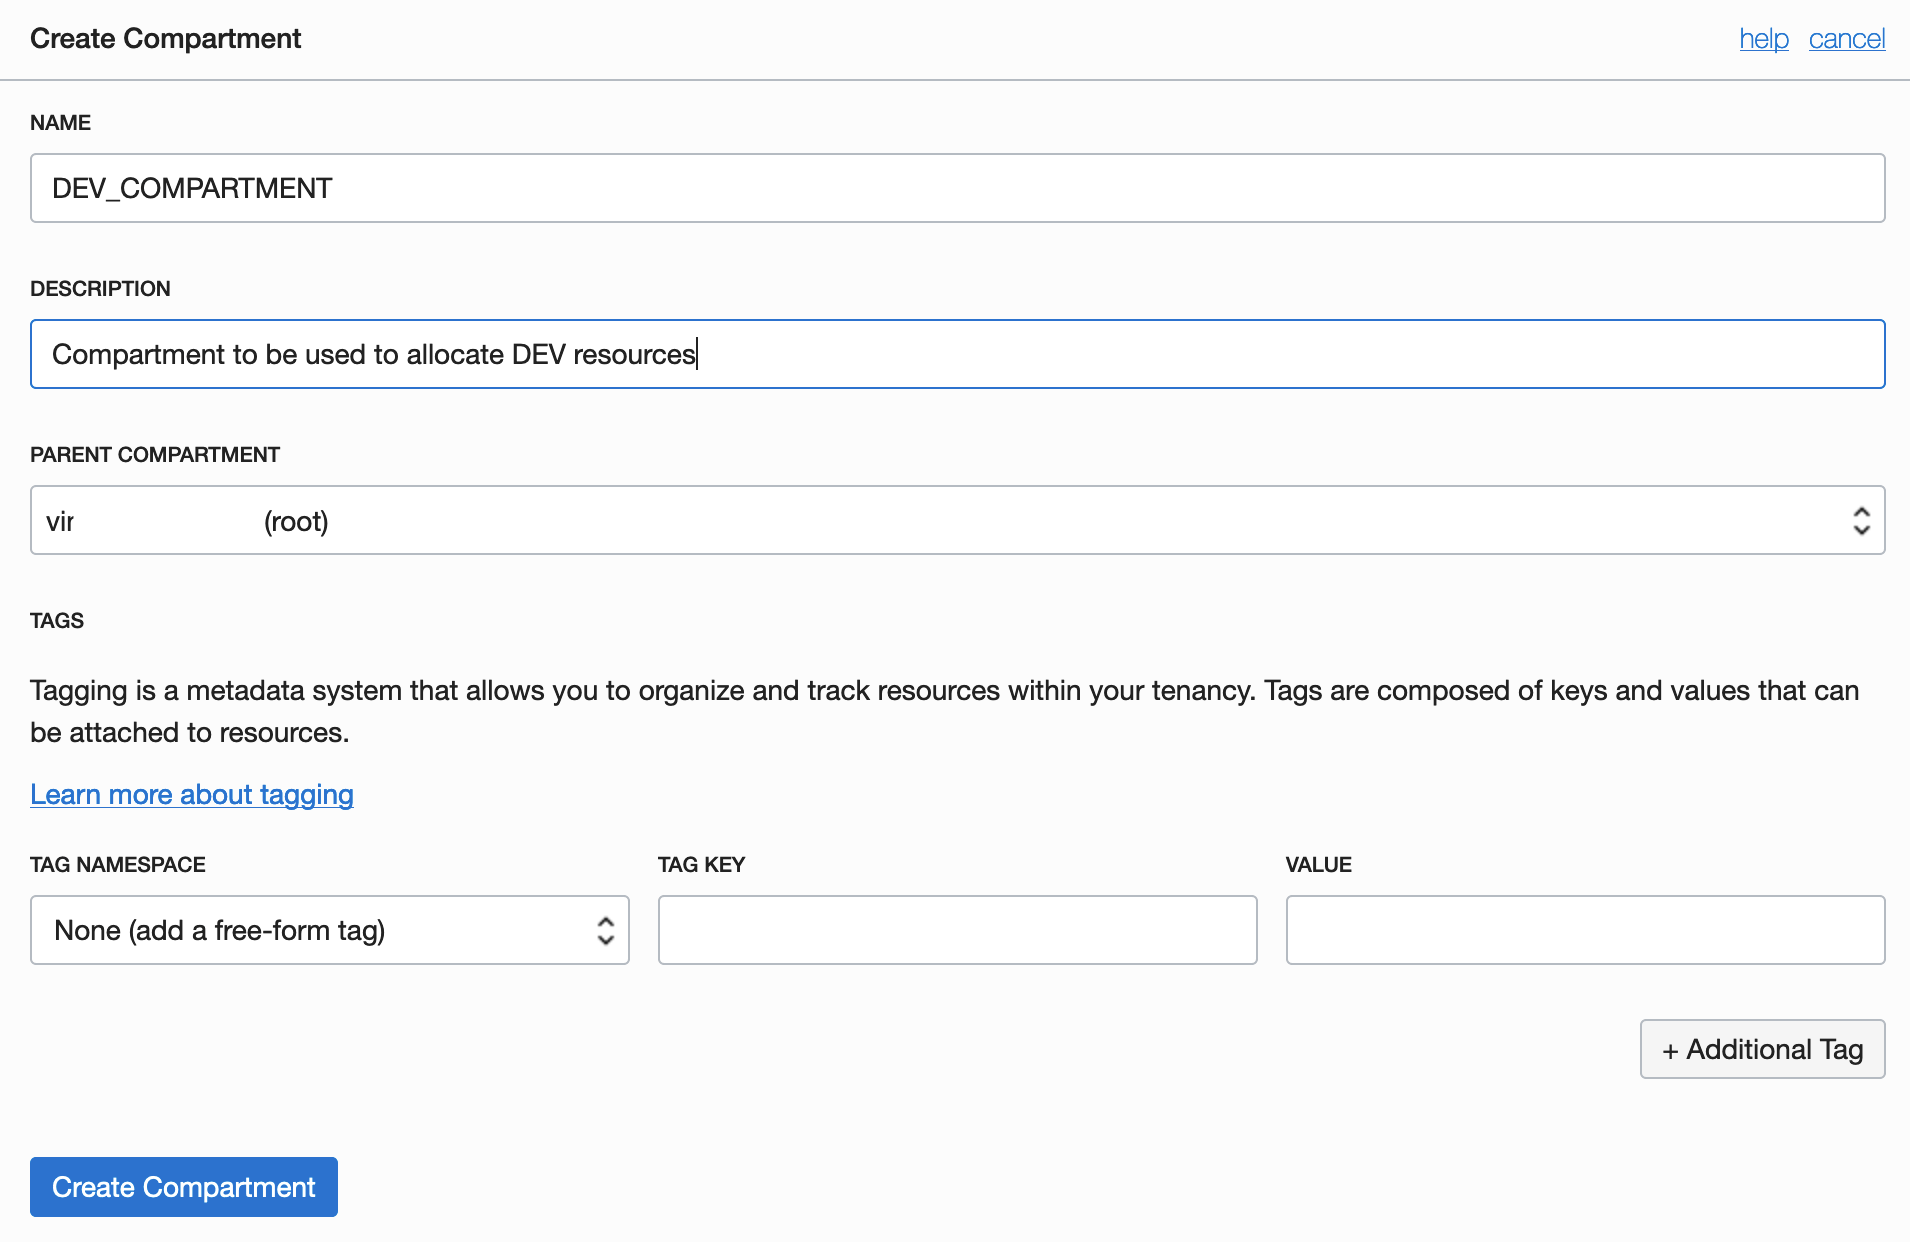
The creation Compartment screen it will be exhibited. You need to input a Compartment Name and a Description. Just as an information, this Compartment it will be created considering the root compartment as parent. This is normal. You can click on [Create Compartment] button:
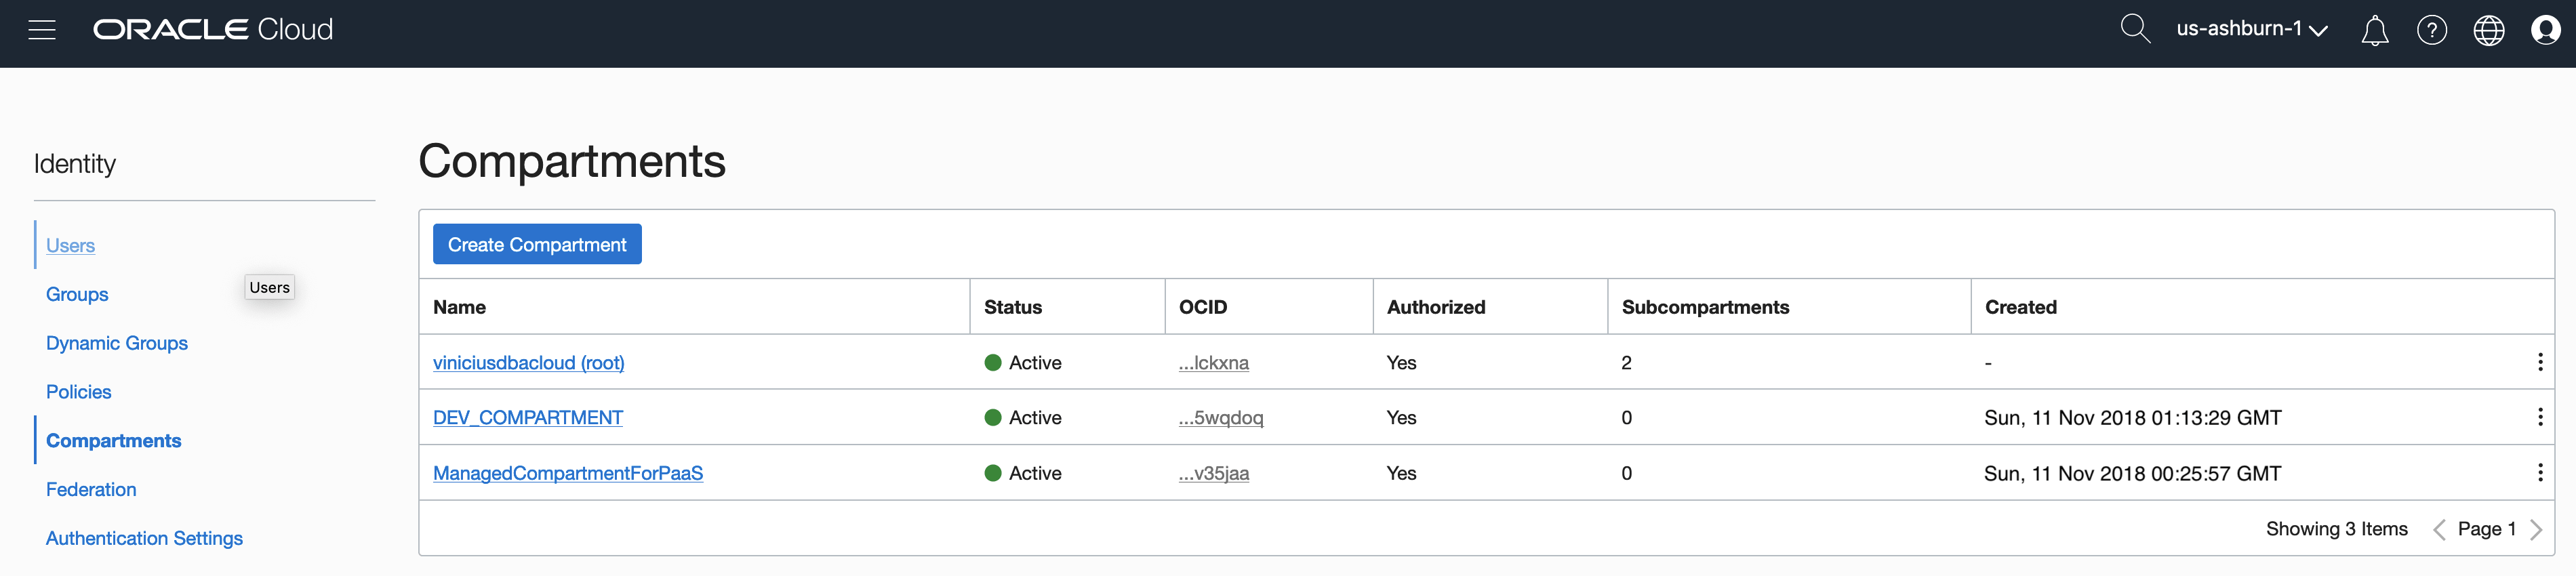
After click on [Create Compartment] button you should see the Compartments screen again, now with newly Compartment created:
VCN Creation
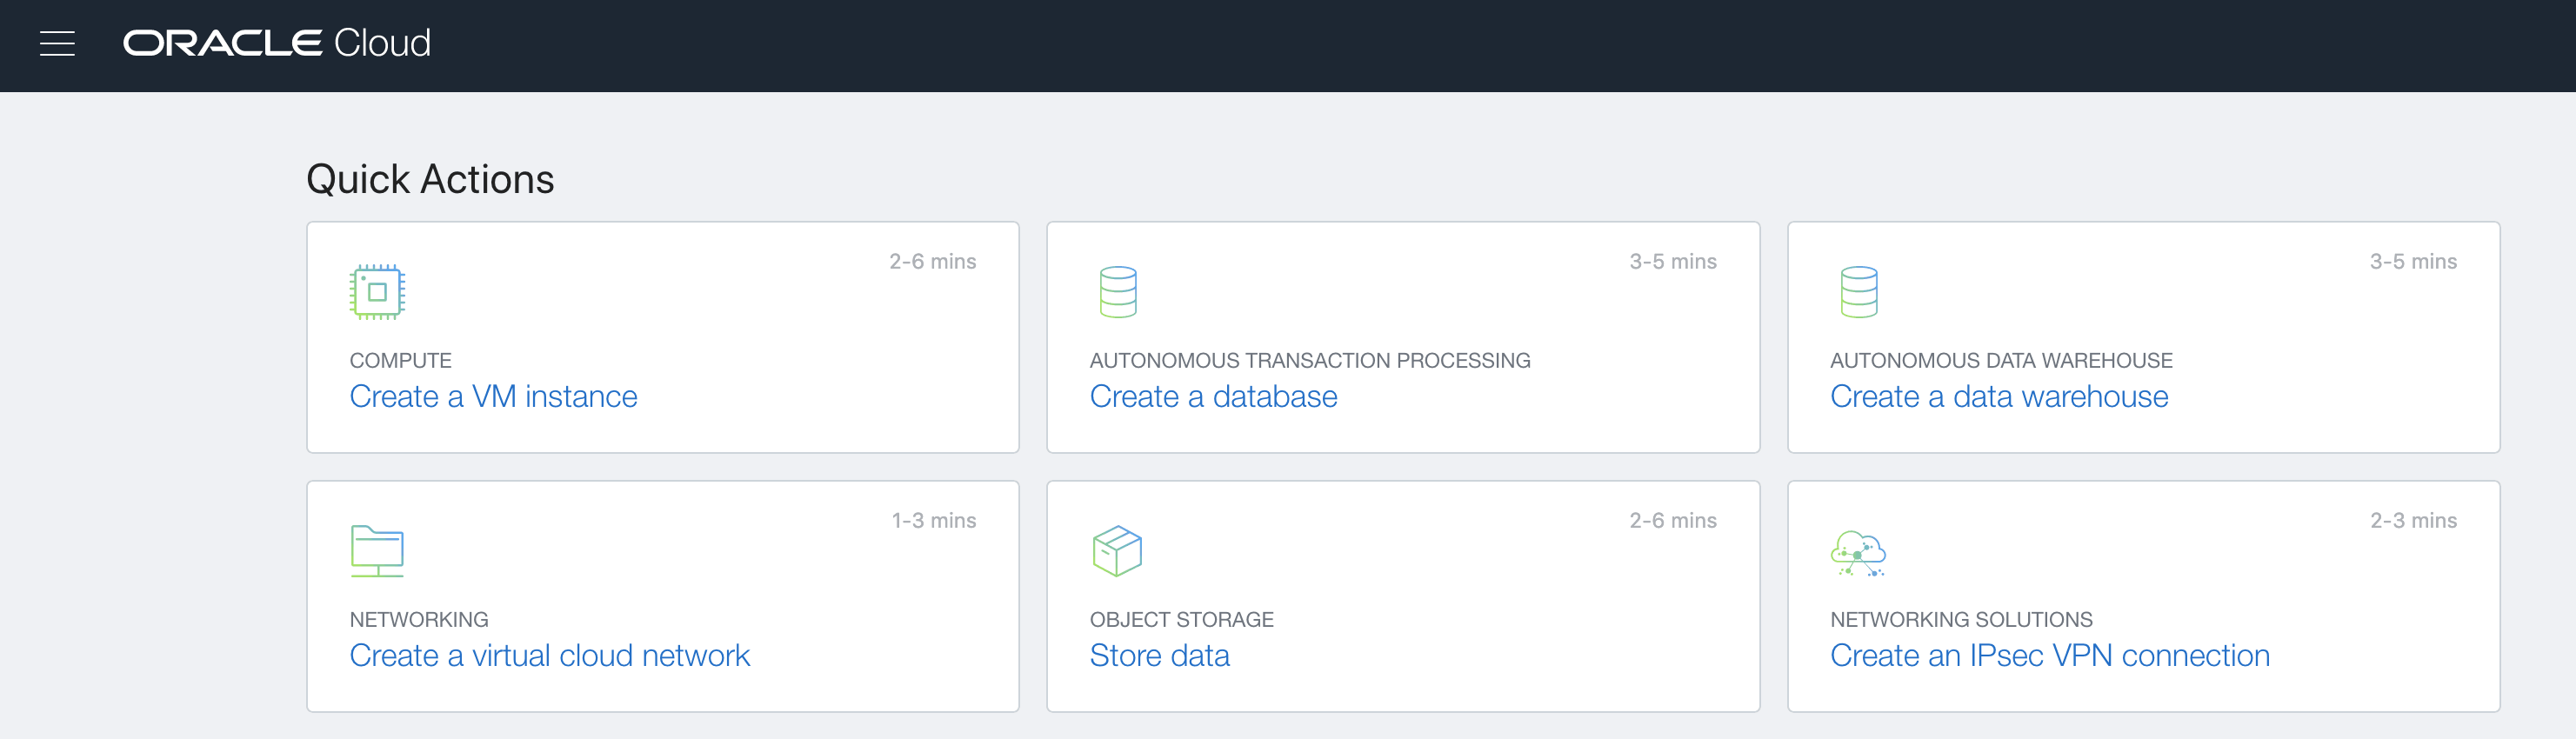
After we create Compartment we need to create our VCN – Virtual Cloud Network. In the home screen, click on [Create a virtual cloud network] button:
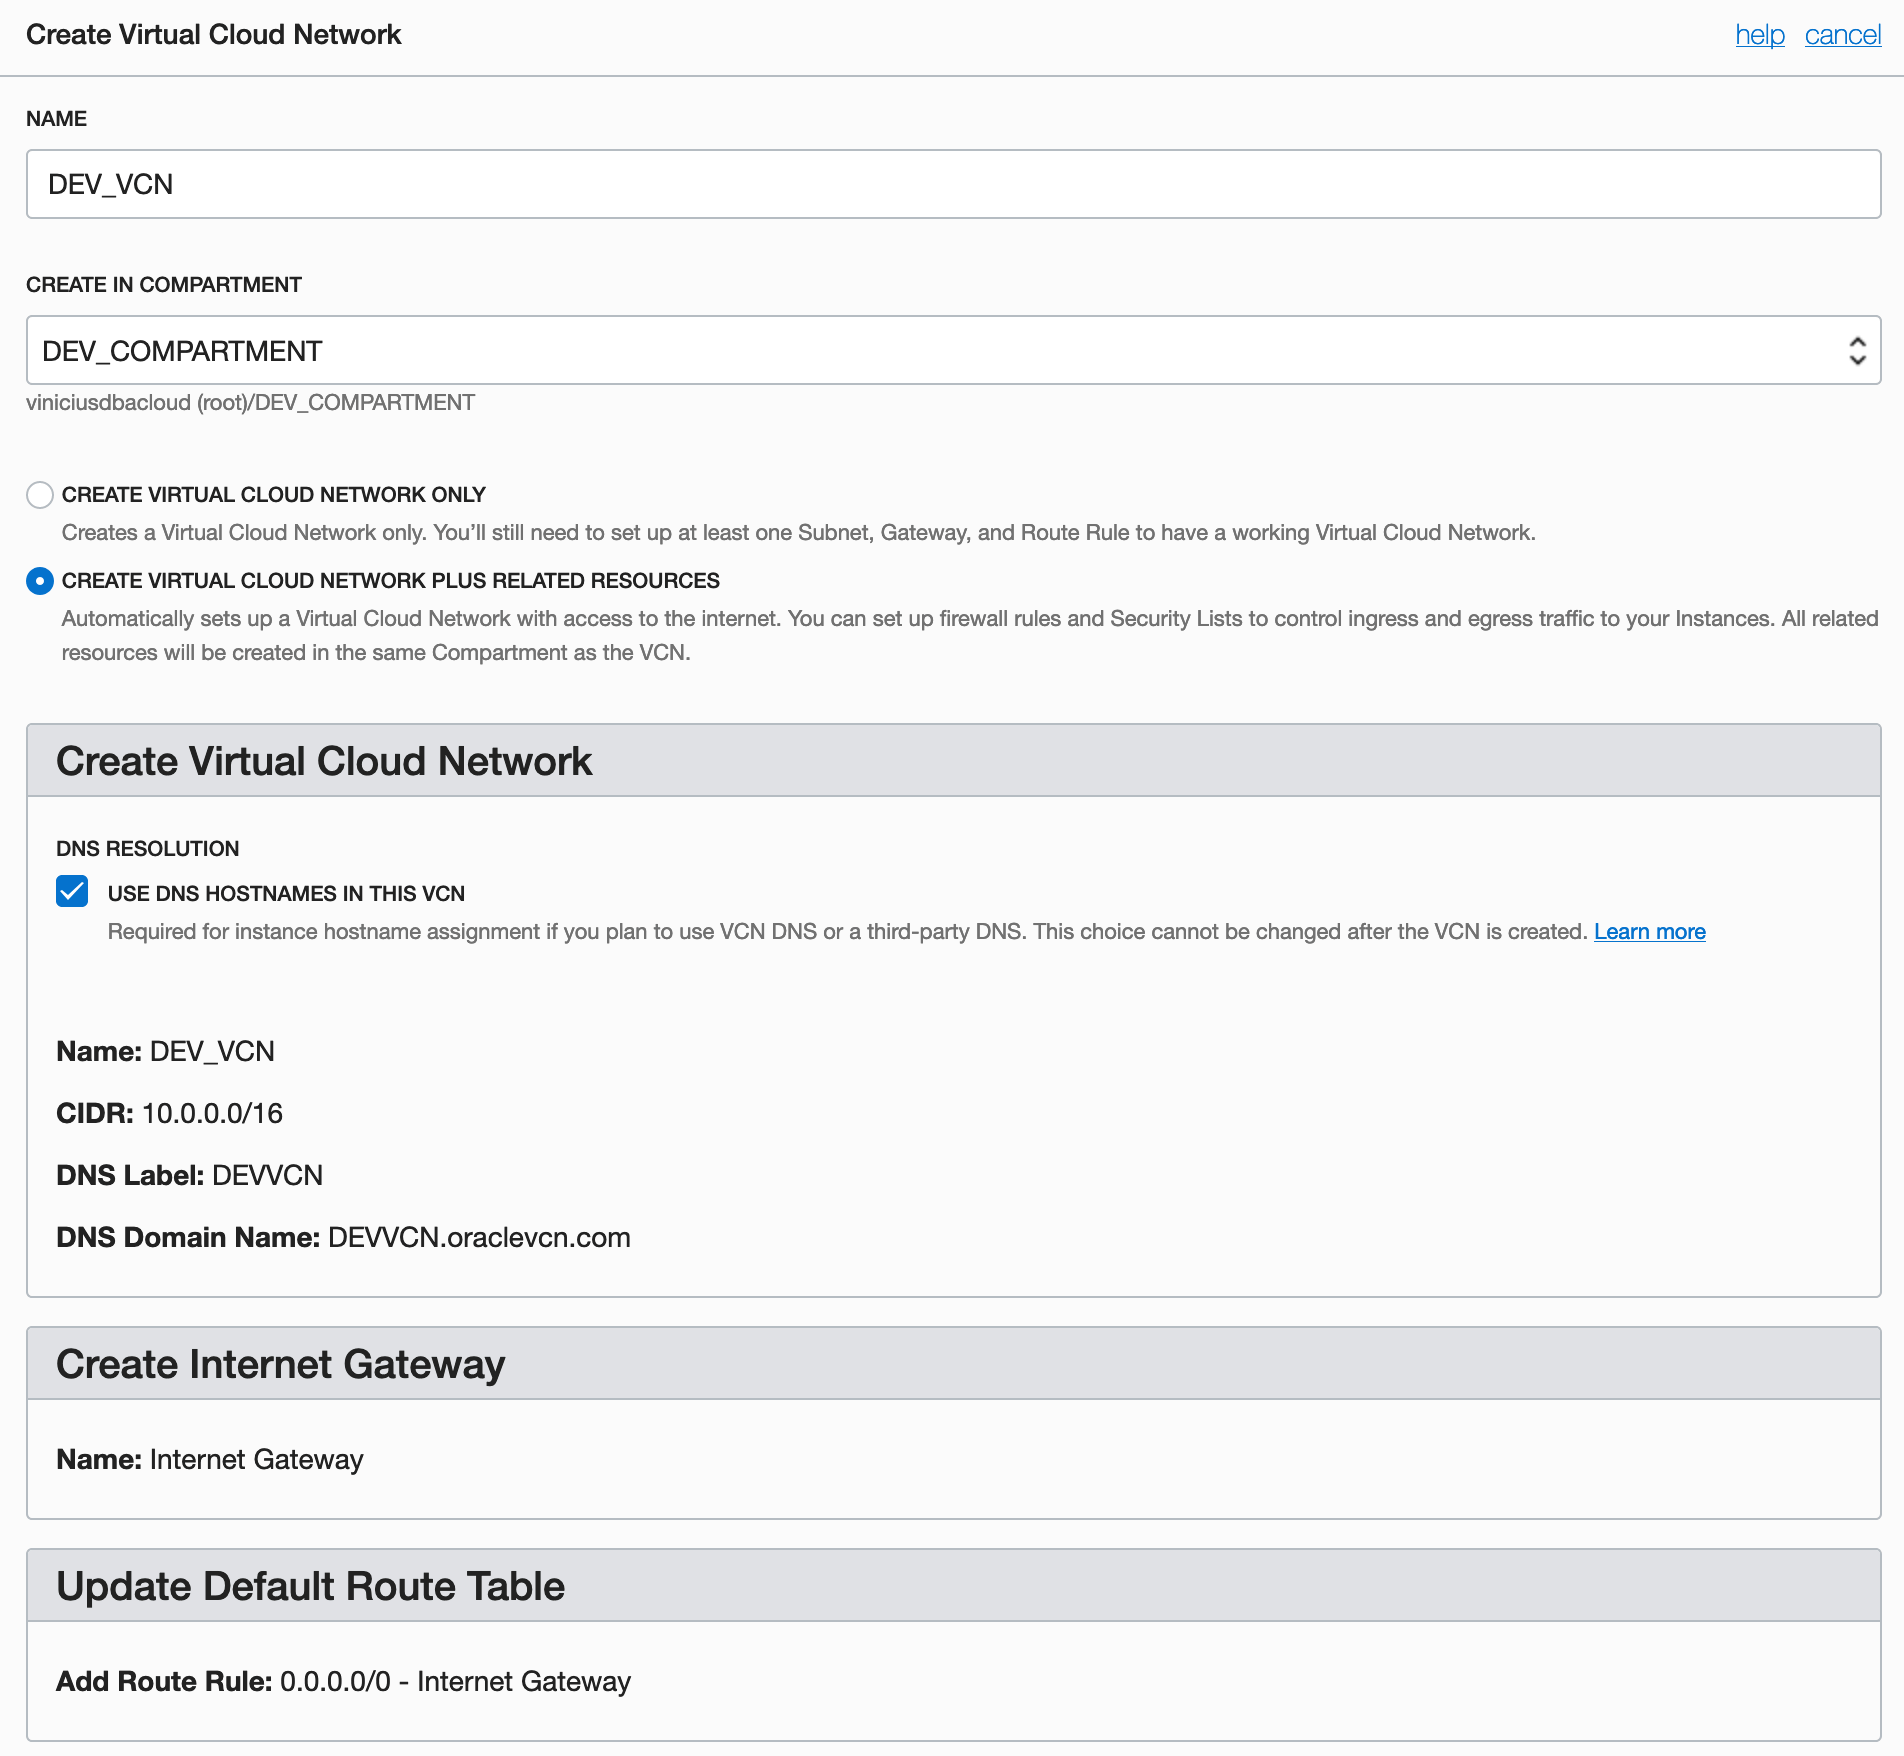
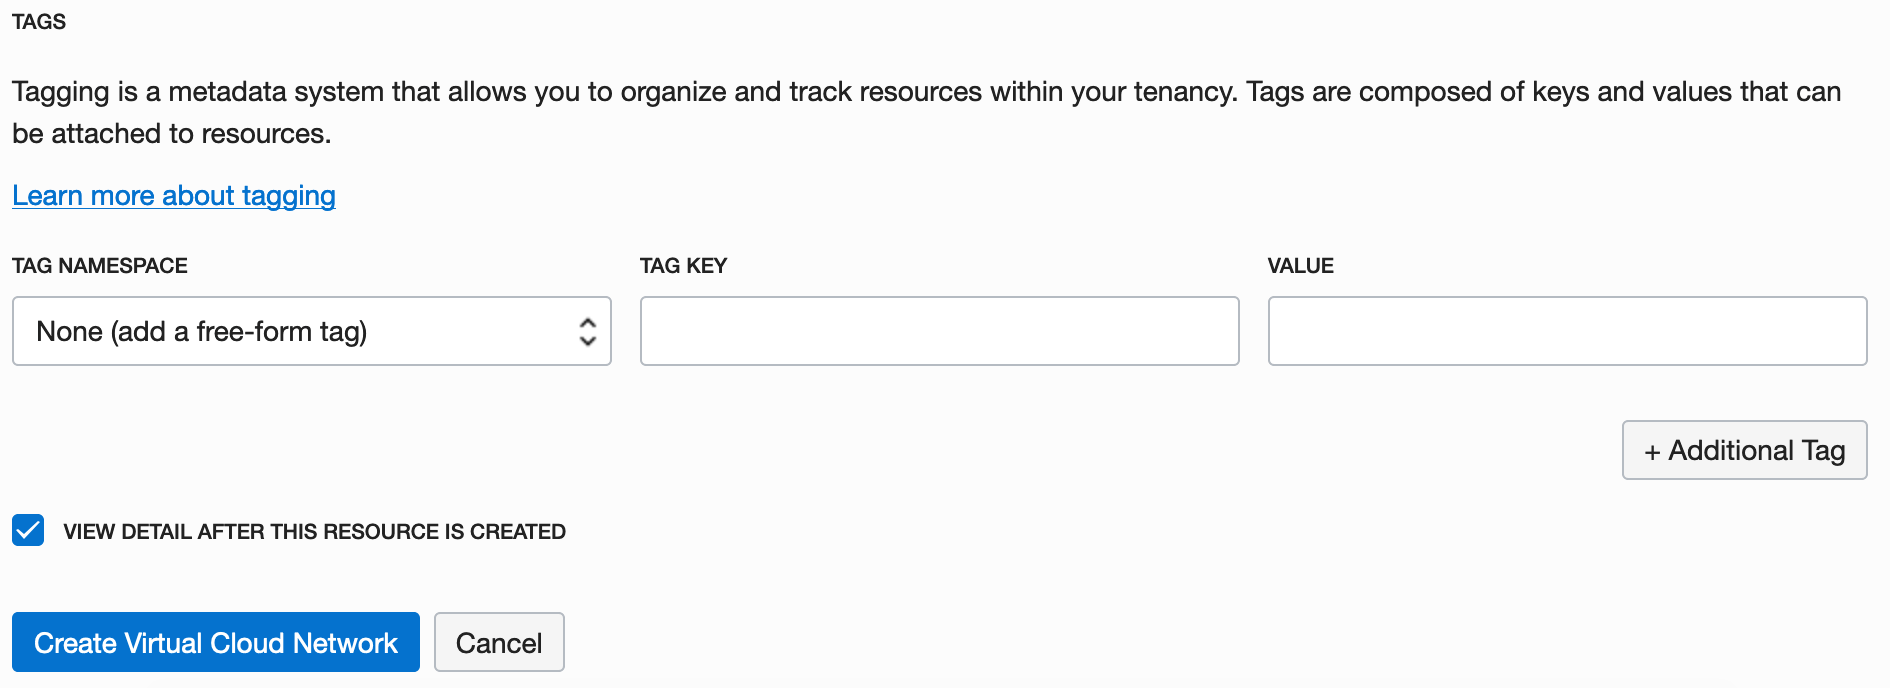
You should define a name for your VCN and the compartment that you want to create the VCN. It’s important to select the newly created compartment. You also should select between two options: create the VCN only or create the VCN plus related resources (security lists, gateways, route tables, subnets). This last option is the best option because you will save some time here. You also can keep the option DNS Resolution selected. After that, click on [Create Virtual Cloud Network] button:
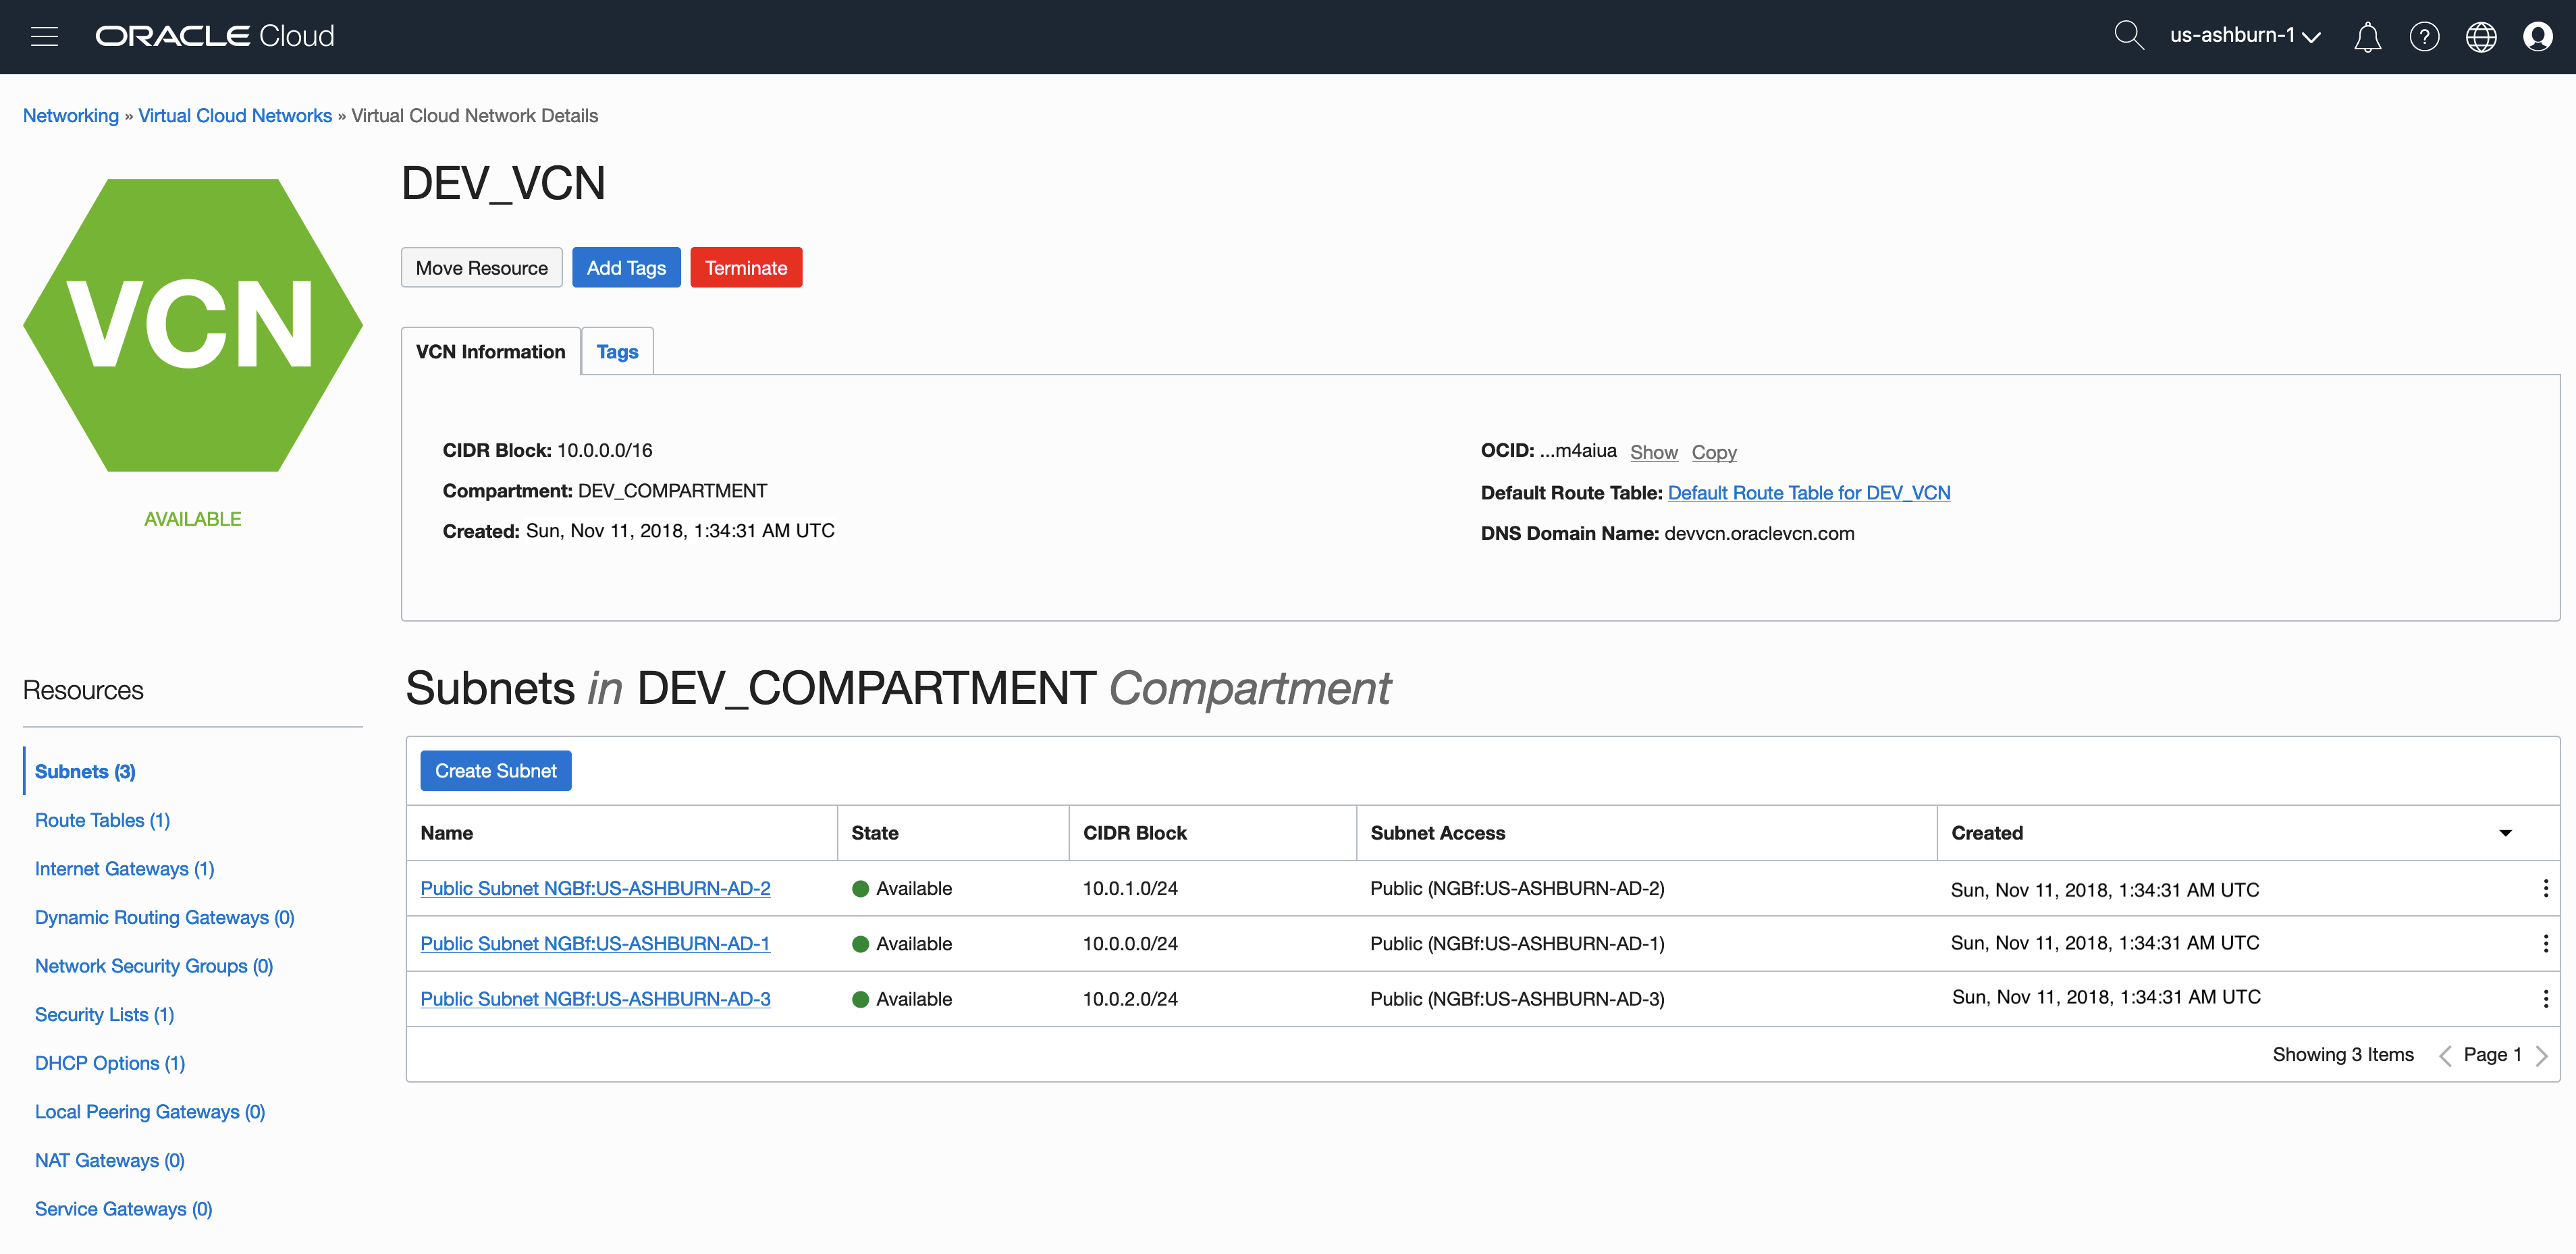
The new VCN, DEV_VCN, was created. We can see in the below screen that we have 3 public subnets, one for each AD for our region:
All set! Now we can continue in the next post with some resources creation.
You can read more about Networking on OCI here:
Peace!
![]() Vinicius
Vinicius