Série de artigos sobre Instalação do Oracle RAC:
Instalação do Oracle RAC 10g Release 2 – Parte 1: Pré-requisitos
Instalação do Oracle RAC 10g Release 2 – Parte 2: Criação da VM
Instalação do Oracle RAC 10g Release 2 – Parte 3: Instalação do Linux
Instalação do Oracle RAC 10g Release 2 – Parte 4: Configuração do Linux
Instalação do Oracle RAC 10g Release 2 – Parte 5: Clonagem da VM
Instalação do Oracle RAC 10g Release 2 – Parte 6: Pré-instalação do RAC
Instalação do Oracle RAC 10g Release 2 – Parte 7: Instalação do Oracle Clusterware
Instalação do Oracle RAC 10g Release 2 – Parte 8: Instalação do Patchset 10.2.0.4 no Clusterware
Instalação do Oracle RAC 10g Release 2 – Parte 9: Instalação do Oracle Database
===================================
Olá pessoal!
Nesse artigo instalaremos o Patchset 10.2.0.4 no Oracle Database.
Bom, vamos lá?
Precisamos verificar se o CD-ROM está montado.
Se estiver, aparecerá da seguinte forma
[root@mvrac1 ~]# df -h
Filesystem            Size  Used Avail Use% Mounted on
/dev/sda1              11G  2.4G  7.8G  24% /
tmpfs                 252M     0  252M   0% /dev/shm
/dev/hdc              3.1G  3.1G     0 100% /media
Se não estiver, deveremos montá-lo:
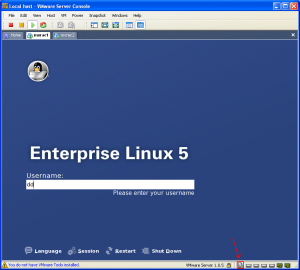
Na tela da VMWare Server Console, deveremos clicar duas vezes no ícone do CD-ROM (identificado pela seta vermelha).
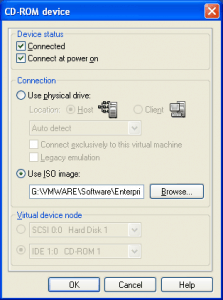
Eu fiz uma imagem ISO com alguns softwares Oracle, portanto, na tela acima, deveremos manter a opção “Use ISO image:” marcada, e clicar em Browse, para escolhermos a mídia do Oracle:
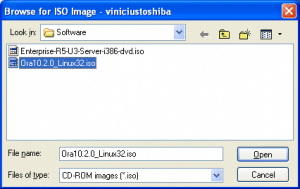
Basta selecionar a imagem ISO, e clicar em Open.
Agora, precisamos montar esse CD no servidor. Como root no servidor mvrac1:
[root@mvrac1 ~]# mount /dev/hdc /media
mount: block device /dev/hdc is write-protected, mounting read-only
Para verificar se o disco foi montado:
[root@mvrac1 ~]# df -h
Filesystem            Size  Used Avail Use% Mounted on
/dev/sda1              11G  2.4G  7.8G  24% /
tmpfs                 252M     0  252M   0% /dev/shm
/dev/hdc              3.1G  3.1G     0 100% /media
Com o disco montado, precisamos acessá-lo:
[root@mvrac1 ~]# cd /media/Ora10.2.0.4
Vamos ver o conteúdo do disco:
[root@mvrac1 Ora10.2.0.4]# ls -l
total 177
dr-xr-xr-x 5 root root   2048 May 21  2008 p6810189
-r--r--r-- 1 root root 178473 Feb 25  2008 README.html
Agora copiaremos o diretório p6810189 para o diretório /home/oracle:
[root@mvrac1 Ora10.2.0.4]# cp -rp p6810189/ /home/oracle/
Agora precisamos acertar as permissões, pois o diretório foi copiado como root:
[root@mvrac1 ~]# chown -R oracle:oinstall /home/oracle/*
Agora, iniciaremos a instalação. Há algumas formas de realizar a instalação:
- Localmente no servidor, através da VMWare Server Console;
- Remotamente, através de um software que simule um X-Server (existem diversas opções gratuitas na Internet);
- Remotamente, através de uma estação Linux/Unix/Mac que tenha a parte gráfica (X) habilitado.
Eu usarei a terceira opção, portanto, a partir da minha estação:
vinicius@Viniciuss-MacBook:~$ ssh -X oracle@172.23.10.11
oracle@172.23.10.11's password:
/usr/bin/xauth:  creating new authority file /home/oracle/.Xauthority
Testando para ver se a parte gráfica está funcionando:
[oracle@mvrac1 ~]$ xclock
O teste funcionou! Vejam:
Pronto!
Vamos iniciar a instalação:
[oracle@mvrac1 ~]$ cd p6810189/
[oracle@mvrac1 p6810189]$ ls -l
total 1784
-r--r--r--  1 oracle oinstall 1620786 Feb 21  2008 10204_buglist.htm
dr-xr-xr-x  4 oracle oinstall    4096 May 21  2008 install
-r--r--r--  1 oracle oinstall  178465 Feb 22  2008 patch_note.htm
dr-xr-xr-x  2 oracle oinstall    4096 May 21  2008 response
-r-xr-xr-x  1 oracle oinstall    1756 Feb 17  2008 runInstaller
dr-xr-xr-x 10 oracle oinstall    4096 May 21  2008 stage
[oracle@mvrac1 p6810189]$ ./runInstaller
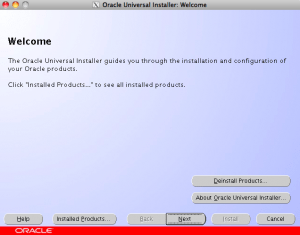
Na tela inicial do Patchset, devemos clicar em Next.
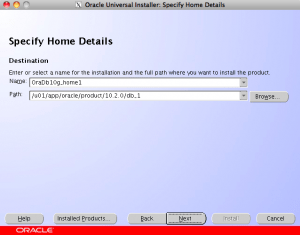
Na tela acima devemos especificar o Oracle Home do Banco de Dados. No entanto, esse Oracle já está selecionado automaticamente. Basta clicar em Next.
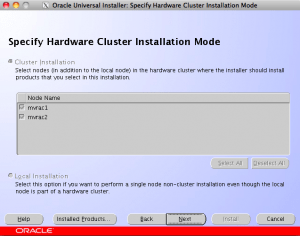
Não tem como mudarmos os itens da janela acima, pois o OUI já detectou que o Oracle Home selecionado foi instalado na arquitetura de cluster, e por isso, os 2 nós já foram selecionados automaticamente. Clicar em Next.
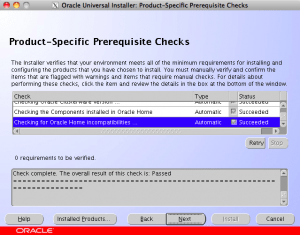
Os pré-requisitos serão verificados. Clicar em Next.
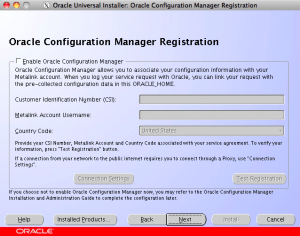
No Patchset 10.2.0.4, é possível habilitar o Oracle Configuration Manager, que auxiliará na aplicação de patches automaticamente baixados pelo Metalink. Por enquanto, não configuraremos esse item. Clicar em Next.
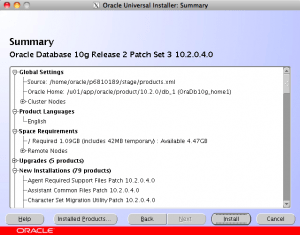
Um resumo sobre a instalação será exibido. Clicar em Install.
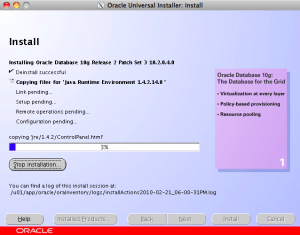
Uma janela com o progresso será exibida. Aguardar.
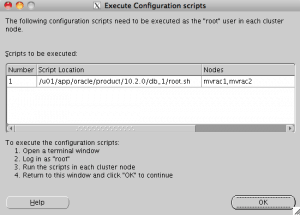
Uma janela será exibida solicitando executarmos 1 script como root nos 2 nós do cluster.
Vamos à execução do script /u01/app/oracle/product/10.2.0/db_1/root.sh no nó mvrac1:
[root@mvrac1 ~]# /u01/app/oracle/product/10.2.0/db_1/root.sh
Running Oracle10 root.sh script...

The following environment variables are set as:
    ORACLE_OWNER= oracle
    ORACLE_HOME=  /u01/app/oracle/product/10.2.0/db_1

Enter the full pathname of the local bin directory: [/usr/local/bin]:
The file "dbhome" already exists in /usr/local/bin.  Overwrite it? (y/n)
[n]: y
   Copying dbhome to /usr/local/bin ...
The file "oraenv" already exists in /usr/local/bin.  Overwrite it? (y/n)
[n]: y
   Copying oraenv to /usr/local/bin ...
The file "coraenv" already exists in /usr/local/bin.  Overwrite it? (y/n)
[n]: y
   Copying coraenv to /usr/local/bin ...

Entries will be added to the /etc/oratab file as needed by
Database Configuration Assistant when a database is created
Finished running generic part of root.sh script.
Now product-specific root actions will be performed.
Após a conclusão do script no servidor mvrac1, vamos executá-lo no servidor mvrac2:
[root@mvrac2 ~]# /u01/app/oracle/product/10.2.0/db_1/root.sh
Running Oracle10 root.sh script...

The following environment variables are set as:
    ORACLE_OWNER= oracle
    ORACLE_HOME=  /u01/app/oracle/product/10.2.0/db_1

Enter the full pathname of the local bin directory: [/usr/local/bin]:
The file "dbhome" already exists in /usr/local/bin.  Overwrite it? (y/n)
[n]: y
   Copying dbhome to /usr/local/bin ...
The file "oraenv" already exists in /usr/local/bin.  Overwrite it? (y/n)
[n]: y
   Copying oraenv to /usr/local/bin ...
The file "coraenv" already exists in /usr/local/bin.  Overwrite it? (y/n)
[n]: y
   Copying coraenv to /usr/local/bin ...

Entries will be added to the /etc/oratab file as needed by
Database Configuration Assistant when a database is created
Finished running generic part of root.sh script.
Now product-specific root actions will be performed.
Clicar em OK.
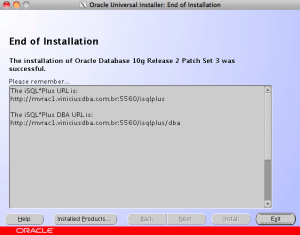
Clicar em Exit.
Clicar em Yes.
Pronto!
Nesse artigo vimos como instalar o Patchset 10.2.0.4 no Oracle Database.
No próximo artigo veremos como criar o Listener no ambiente clusterizado.
Um abraço!
Vinicius
Related posts
Sobre

Disclaimer
Minhas postagens refletem minhas próprias opiniões e não representam necessariamente as opiniões do meu empregador, a Accenture.

